Welcome to the world of cross-stitch!
Dear friends! We sincerely welcome you to our cozy crafting corner. Your choice of our products is not just a purchase — it’s a step into the amazing world of creativity and self-expression through the art of cross-stitching.
Cross-stitch embroidery is not only an exciting hobby, but also an opportunity to create unique decorative items that will delight you and your loved ones. Each stitch, each cross — is a part of your soul invested in the piece you are creating.
We have prepared a detailed guide to help you make your first steps in this art as comfortable and clear as possible. Whether you are a beginner or already have experience in embroidery, our recommendations will help you achieve excellent results.
Let this creative journey fill your life with new colors and emotions. Let’s create something beautiful together!
Below you will find a step-by-step guide that will become your reliable assistant in the embroidery process. Happy stitching!
Getting Started
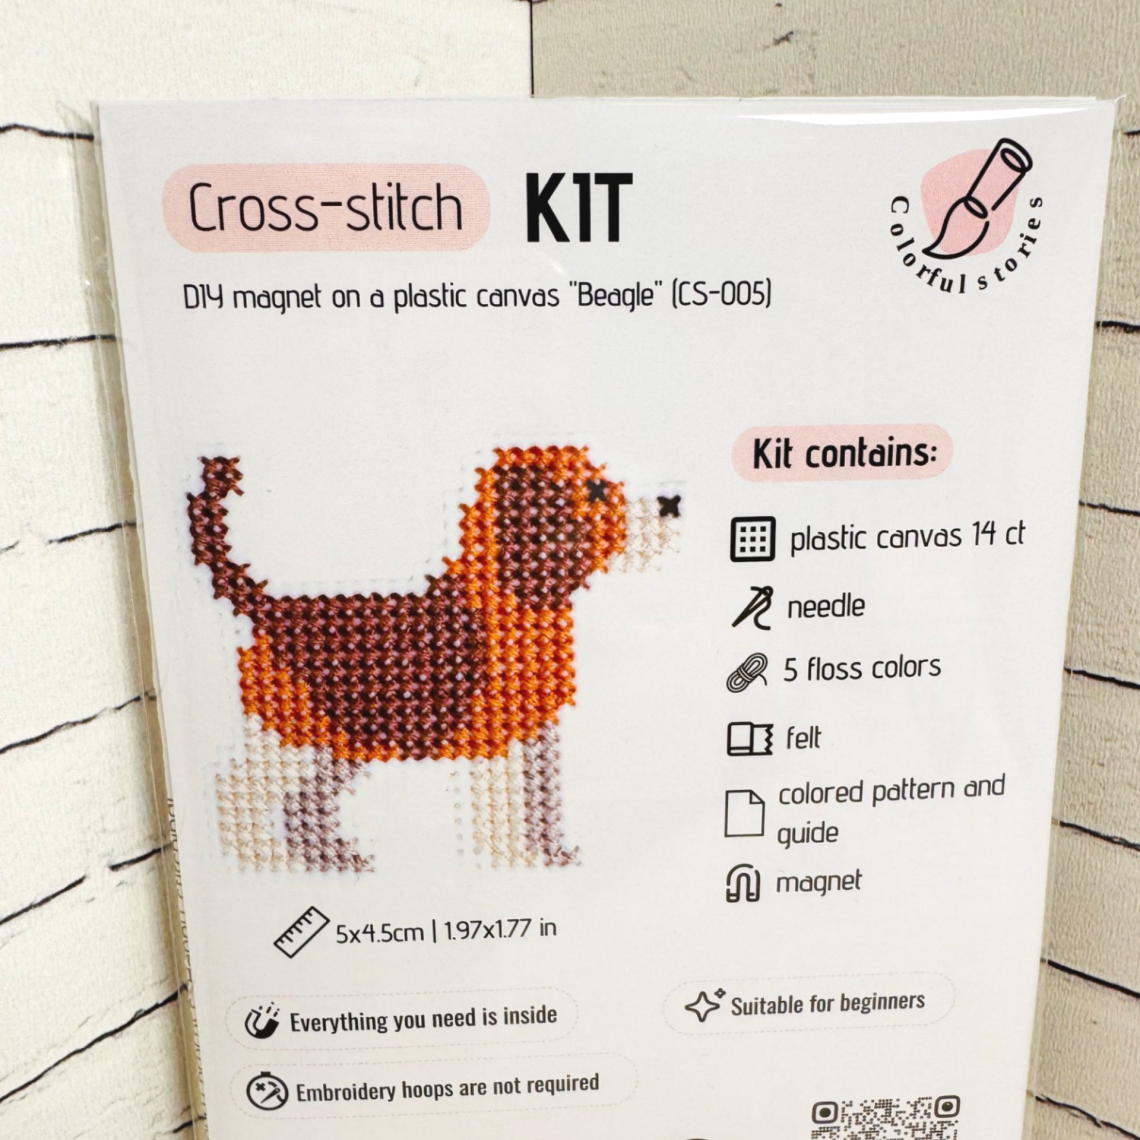
Each thread color corresponds to the matching color on the chart.

All colored squares are embroidered with full cross-stitches using two strands of thread, unless otherwise indicated on the chart.
Colored lines on the chart represent the backstitch. How to make it — read below. It is usually done with one strand; the exact number of strands is specified for each design on the chart.
Some designs may have a colored background — it is used to highlight the image. This background does not need to be cross-stitched!
To ensure the design fits perfectly on the canvas, it is best to start working from the center. Black arrows on the chart will help you locate it.
Tips and Instructions for the Embroidery Process
Preparation
Canvas and Chart
This cross-stitch guide will help you understand how to cross-stitch correctly from a chart and where to begin.
To find the center of the embroidery, gently fold the canvas in half twice (into quarters). This center corresponds to the intersection of two lines with arrows at their ends on the chart.
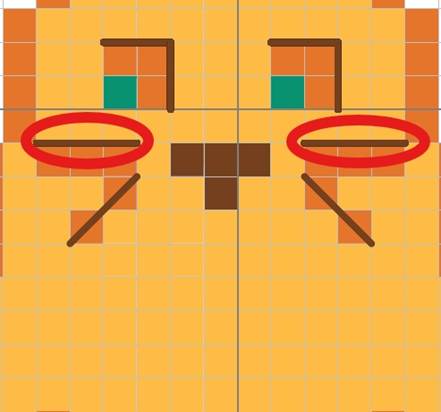
Note: the chart does not reflect the final size of the embroidery. The squares on the chart correspond exactly to the squares on the canvas. Blank squares indicate areas that are not to be embroidered (Fig. 1).

Threads
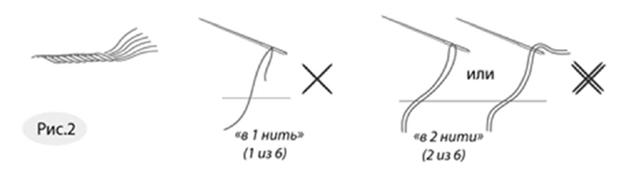
A skein of embroidery floss (stranded cotton) consists of 6 strands. To ensure your finished work matches the photo on the kit cover and to avoid running out of thread, use exactly the number of strands specified in the chart.
Fig. 2 shows what is meant by “embroidering with one strand” and “embroidering with two strands.”
Cross-Stitch
It is more convenient to embroider from the center, moving toward the edges. First, stitch the main cross and half-cross stitches, then add details such as backstitch, French knots, etc.
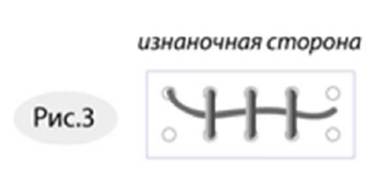
The working thread is secured on the backside by passing it under several completed stitches (Fig. 3). After completing a section, finish the thread by passing it under existing stitches on the back. Knots are not recommended, as they can make the embroidery uneven.
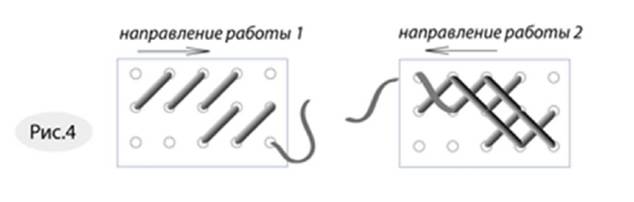
It is best to work in horizontal rows. First, make all the bottom stitches in one direction, then return and complete the top stitches (Fig. 4). To keep the embroidery neat, maintain a consistent order of top and bottom stitches across the entire piece. Thread tension should be even and moderately loose, so that the crosses appear three-dimensional.
When moving from one embroidered section to another, avoid long thread runs on the backside exceeding 2–3 cm; otherwise, the fabric may pucker. It is better to cut the thread and re-anchor it in the new area. If you make a mistake, carefully unpick the stitches with a needle — using scissors may damage the canvas.
Additional Stitches
These are done last, on top of the completed cross-stitches.
Backstitch
This stitch is used for outlining details and adding expressiveness to the embroidery. It is shown on the chart as thin lines.
The technique is called “back needle”:
The needle comes up to the front at point 1 and goes down at point 2. Then it comes up from the back at point 3 and returns on the front side to point 1, and so on.
Long lines should be divided into small segments of 1–1.5 cm, carefully following the design.
Straight Stitch (Backstitch variation)
Used to add detail and clarity. Represented on the chart by thin lines.
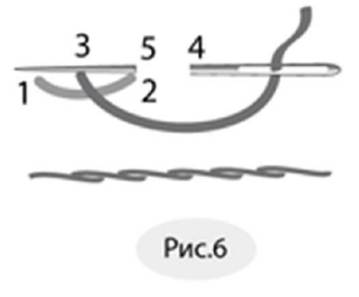
Worked from left to right using the “back needle” method.
The needle comes up at point 1 and goes down at point 2. The next stitch (2–3) starts at point 3 — the midpoint of the previous stitch (1–2) — goes down at point 4, then comes up at point 5, which coincides with point 2 (Fig. 6).
French Knot
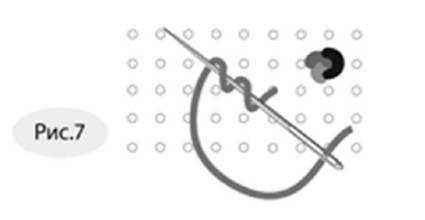
Bring the needle from the back to the front of the fabric. Wrap the thread around the needle tip once (for a single wrap knot) or twice (for a double wrap knot). While holding the thread taut, pull the needle through to the back, exiting 1–2 mm away from where the thread came up. Carefully pull the needle through to the back while gently pressing the knot with your thumb. Tighten the knot securely (Fig. 7).
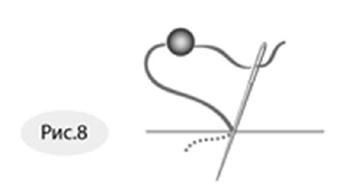
Bead Attachment
Thread the needle and bring it to the front side of the embroidery. Slide a bead onto the needle and slide it down the thread until it rests against the fabric. Pass the needle back to the back side through the same hole to secure the bead in place (Fig. 8).
Washing and Ironing
We recommend washing the finished embroidery in slightly warm soapy water. Gently press out excess water by rolling it in a towel, then lay it flat to dry slightly.
While still damp, iron the embroidery face down on a towel, without pressing hard, so that the front-side crosses remain convex and are not flattened.
Have a nice stitching!